
Create a group, review invitations, and manage members in White Noise for Linux.
Text follows the reviewed Linux source. Screenshots show v2026.10.6-build.1 with synthetic offline data. Controls can differ; cross-client messaging and full recovery have not been verified.
Create a group
- In Chats, open New chat, then choose New group.
- Enter a Group name.
- Optionally click Choose image or Create from emoji for the group photo. Remove clears a photo you selected during setup.
- Under First member, search your contacts and select someone, or paste a Nostr address.
- If Look up appears for an address, complete the lookup, then click Create group.
Linux requires a first member; you cannot use this flow to create an empty group. After creation, use Members to invite more people.
Accept an invitation
Open the pending conversation and review who invited you before clicking Accept. To reject it, click Decline and confirm. Declining removes the chat from your list; joining later needs another invitation.
Open group settings or members
Click the conversation name or avatar, or the header's Settings control, to open Group settings. The separate Members control opens the member list.
Members can view the group's name, description, photo, and disappearing-message timer. Only admins see controls for changing group details, inviting people, and managing admin rights.
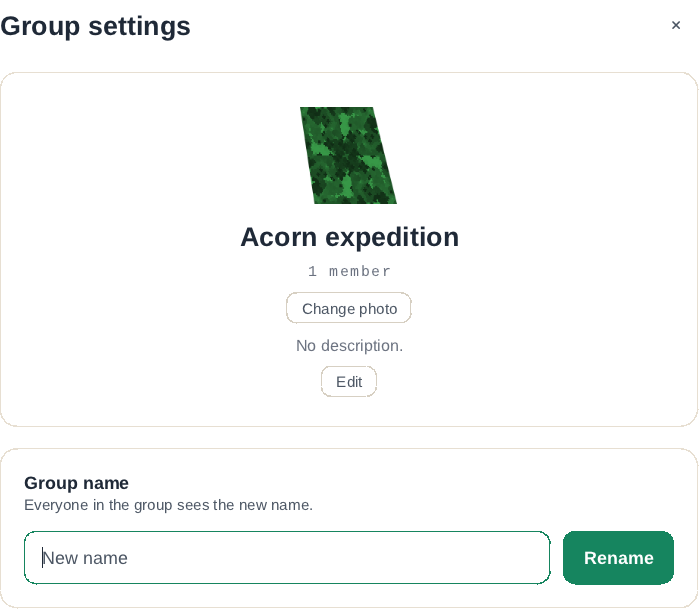
Edit group details
As an admin, open Group settings:
- Enter a new Group name and click Rename.
- Click Edit by the description, change it, then click Save. Cancel keeps the current description.
- Click Change photo, then From file or From emoji.
These changes are shared with the group. If a photo fails to decode, try a PNG or JPEG.
Search images is another photo option. Using web image search contacts an outside search service and image hosts; use a local file if you do not want those requests.
Invite and manage members
- Open Members.
- As an admin, enter an
npub, hex public key,name@domain, or.bitaddress under Add member. - Use Look up when requested, then Invite.
For an existing member, open their ... menu. Admins can choose Promote, Demote, or Remove, then review the confirmation. Promoting gives the person permission to add and remove members and change group details. Demoting leaves them in the group as a regular member.
Removing a member cuts off access to new group messages. It cannot erase messages, files, exports, or screenshots they already kept.
On your own admin row, Step down removes your admin rights while keeping you in the group. Another admin must grant those rights back.
Members can use Nickname on another person's row without admin rights. Enter the nickname and press Enter. This changes a local label, not the person's public name or the group's membership.
Set disappearing messages
Changing the timer affects messages already in the chat as well as new messages. It applies to everyone. A timer cannot remove copies someone saved, exported, forwarded, or captured.
As an admin, open Group settings and choose Off, 1h, 1d, 1w, or 4w under Disappearing messages. Review the prompt and click Change timer to apply it. Non-admins see the current timer without controls to change it.
Mute, archive, or leave
To mute a conversation, right-click its row in the chat list and choose Mute. Unmute turns alerts back on. This is separate from the global notification settings.
Archive in the same menu hides the conversation from the main chat list without leaving it. All-chats search can still find locally stored messages from archived chats.
Leaving stops new messages for you. You need a new invitation to rejoin. If another person needs to manage the group, promote them before leaving or stepping down.
Open Group settings, click Leave group, and confirm Leave.
Save a transcript
Group settings includes Export chat with HTML and Markdown options. These produce readable files from the loaded chat window, not a restorable account backup. Read the export warning and steps in Messages.